How to Install Bamboo Hardwood Flooring (part 3 of pantry remodel)
It has been an arduous process, in my spare time, to complete the pantry remodel. In my last post, I shared the process of hanging drywall and painting.
I wanted to paint the wall before starting the floor simply for the lack of cleanup. I don’t like the idea of cleaning paint off of new flooring.
My wife and I chose a solid bamboo hardwood flooring in a honey color. It was certainly not the cheapest option in flooring, but the way I see it is “If you spend more now on a project, you will never regret having spent the few extra bucks later. You may, however, regret not spending a few extra dollars if you go cheap.” I do not want to install a floor just so I can re-install a floor in 10 years. This solid wood Bamboo Flooring will last a lifetime.
We plan on staying in this house long term, so we are also trying to make lasting improvements to make the home meet our needs.
In part 1 of this pantry remodel series, I prepped the floor by tearing out the old wood floor and putting in new sub-flooring. It is 3/4″ plywood with high quality screws to help it last longer should there be moisture.
The flooring was purchased about two months before it was installed, which meant it had plenty of time to acclimatize to the temperature and humidity of the house. This is, according to the instructions with the flooring, a very important step in the installation process. Wood will expand and contract with humidity changes, so you want it to be the same as your home’s humidity level when it is installed.
As you may be aware from previous posts, my pantry floor has a large door in it. This door swings open to gain access to my basement. I installed the flooring parallel with the short walls, which wasn’t the easiest way, as the door placement required me to cut every single piece of bamboo flooring, save two pieces. It took about 5-6 hours in total.
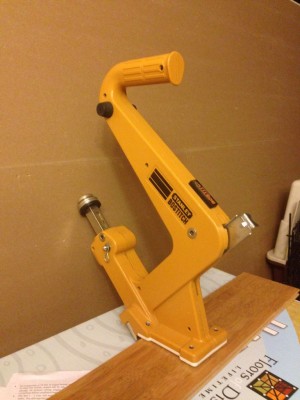
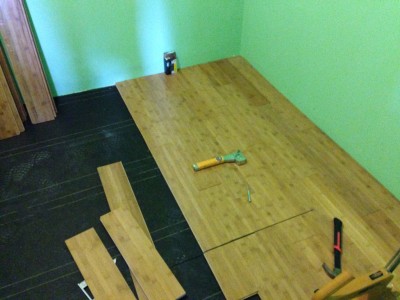
Although it was not explicitly required in the instructions, I laid 15# tar paper as an underlayment for the flooring, stapling it down with my Heavy Duty Hammer Tacker. The first row of flooring was laid with a 1/4″ spacer behind it, since wood will expand in its width, and not length. My Bostitch hardwood flooring nailer
could not be used on the first row because there was no room for the mechanism, so I used 2 1/4″ spiral flooring nails for this first row. After the first row was completed, I simply used the cutoff pieces from the right side at the beginning of the next row, always taking care not to use a piece smaller than a few inches so there would be material to nail to.
Once I reached the first edge of the door, I cut a piece out of the flooring to match the width and used that very piece on the door. This kept the flooring at an exact match on the door as the rest of the floor. I continued in this manner for the entire floor. Once I reached the final two rows, I again had to use the spiral flooring nails and not the flooring nailer.
Overall, installing bamboo hardwood flooring was simple, and went only slightly slower than laminate flooring. The only reason, though, was that I had to cut nearly every piece.
I would definitely recommend bamboo hardwood flooring. It is very nice, and I love it!

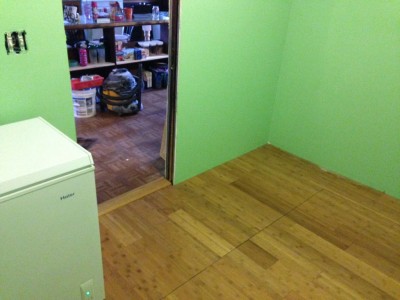
We were so excited to have the flooring installed, we couldn’t wait to get our deep freezer out of the kitchen before taking this photo!
A handy tip for installing bamboo hardwood flooring using the Bostitch flooring nailer:

Click the image to see a factory reconditioned nailer (this, amazon link, is where I purchased mine)
When using a Bostitch hardwood flooring nailer, don’t be afraid to hit it! My model is the much cheaper, manual version. As you can see in the photo, there is a silver cylinder in the back that you hit with a hammer. I used a deadblow hammer, and it worked out very well. Several times I hit it too softly or off-center and I had to pull out the flooring nail. If I hit it just a little less than needed, I used a nail set and hammer to finish driving it in completely.

Comments
How to Install Bamboo Hardwood Flooring (part 3 of pantry remodel) — No Comments
HTML tags allowed in your comment: <a href="" title=""> <abbr title=""> <acronym title=""> <b> <blockquote cite=""> <cite> <code> <del datetime=""> <em> <i> <q cite=""> <s> <strike> <strong>