DIY Roof Replacement (Part 2)
If you’re picking up after reading DIY Roof Replacement Part 1, you know the steps I’ve already taken. The roof is tar papered with two layers of 15# paper. On to my 7th step:
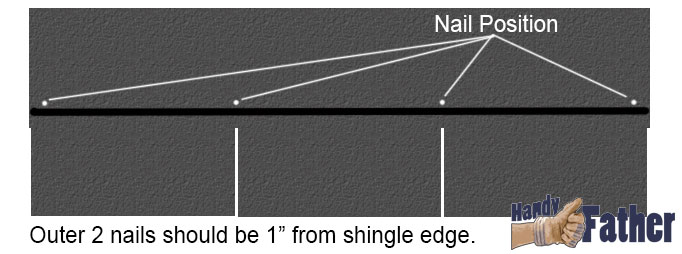
I went with a standard 3-tab ebony shingle that has a 25 year warranty. It is as economical as it is beautiful. I’m using 1 1/4″ standard aluminum roofing nails, 4 nails to a shingle. This image shows where I’m putting the nails:

Step 7: Roofing starter strips
Start with the bottom edge of the roof. Shingle Starter Strips may be purchased, or as I’m doing they can be made. To make a starter strip, simply cut the shingle on a line parallel to the adhesive strip but above the tabs. If the roof edge is adjacent to a wall like my roof, start on the side of the wall and work out. Do the entire bottom edge of the roof before moving on to the next step.
Step 8: How to do three tab shingles
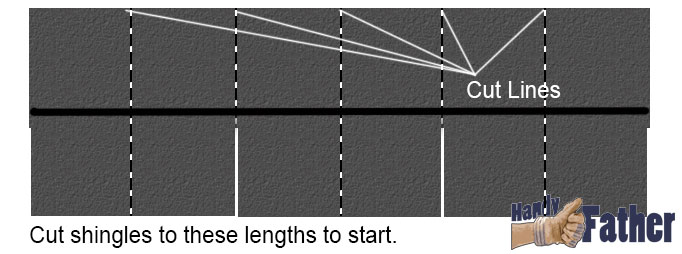
If you look at this image you’ll see where to cut the shingles to get started. Each line represents where to cut each shingle. I highly recommend using roofing “hook blades” to cut the shingles, as you can cut them from the top, and it is quick and easy. Keep the cutoffs for the other side of the roof.

If your starter strip is a whole shingle, begin the the shingle one cut mark shorter than a full piece. Then proceed to attach the next size down until the smallest piece is in place. The cut edge of the shingle should be to the outside edge of the roof, with the butt edge of the shingle to the inside. Once you have this stair-step of shingles going, finish those 5 or six rows to the end of the roof. At the end of the roof you should be able to re-use most or all of the cutoffs. Repeat this process to the top of the roof.
Step 9 (if needed): Use step flashing alongside walls
If your roof, like mine, has a wall alongside the pitch of it, you’ll need to use Step Flashing to keep water from getting in the walls where they meet the roof. I used 8″x8″ aluminum flashing which is bent at 90º angles in the middle. As you roof, starting on the wall side, you’ll put a piece of flashing down under each shingle. The part of the flashing that goes up should be behind any siding optimally. Be sure to overlap each piece of flashing with the subsequent piece to ensure watershed.
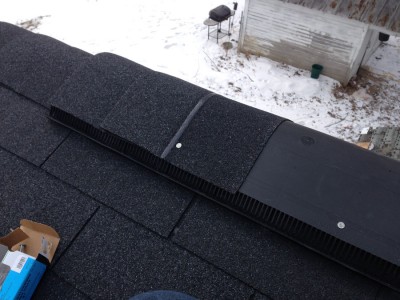
Step 10: Ridge cap the roof.
Instead of explaining in wordy detail, I have found a youtube video that does the ridge cap much like I did.
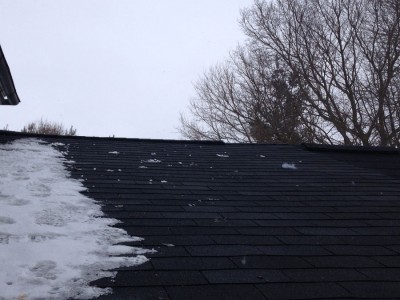
With the ridge cap in place, I call this roofing project done. Hopefully I have 25 years until it needs replaced again!
- Roof Repair
- I think it was more rewarding to finish this roofing job in the winter.
Did you do a DIY roofing project? How did you do it differently? Let me know in the comments below!


Comments
DIY Roof Replacement (Part 2) — No Comments
HTML tags allowed in your comment: <a href="" title=""> <abbr title=""> <acronym title=""> <b> <blockquote cite=""> <cite> <code> <del datetime=""> <em> <i> <q cite=""> <s> <strike> <strong>