How to build floating stairs step by step
Handy Father already had an article on how to build floating stairs, but this post gets into more detail on the actual process used when they were being installed, step by step.
Related book: Building Stairs (For Pros By Pros)
There are many different ways how to build floating stairs, but this step by step illustration is only one. If you build your own floating stairs, HandyFather.com would love to feature your design in an article as well.
How to build floating stairs step by step
Step 1 & 2: These stairs were build in a basement, so the 2×4 wall posts were lag bolted to the concrete block wall. The inner stringer was lagged to the 2×4 wall posts after the stringer support braces were attached. Multiple screws were used for added stability.
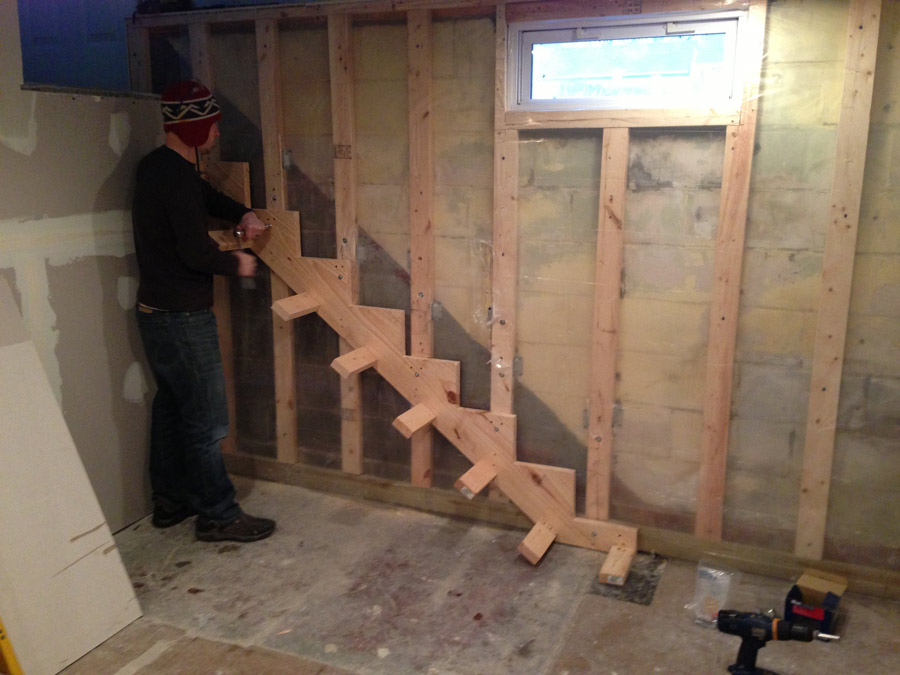
Floating stair stringer support braces screwed to stringer before wall mounted
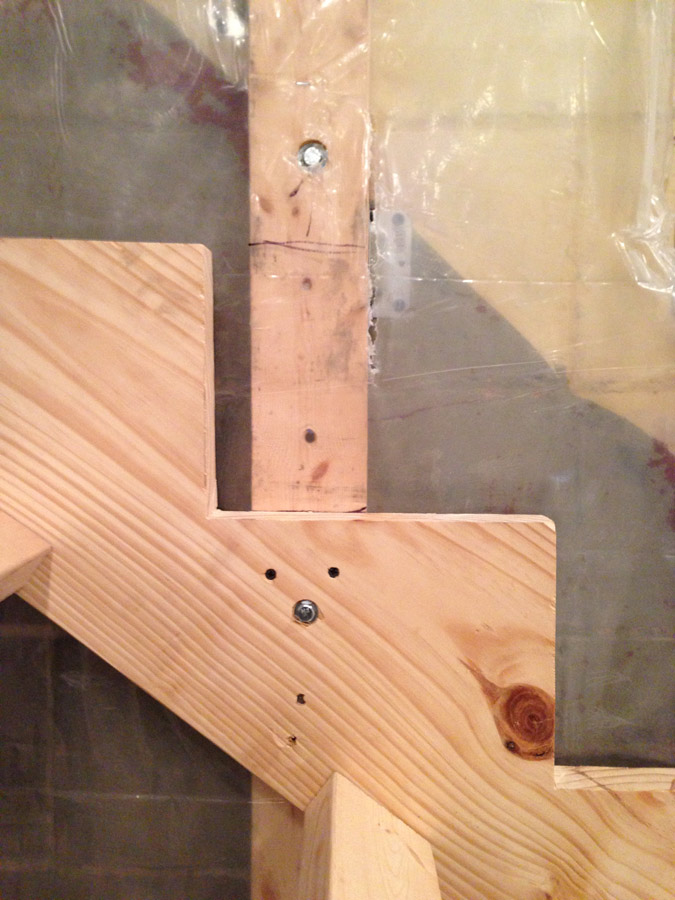
The 2×4 wall posts were lag bolted to the wall before the stair stringer was lag bolted to the posts
Step 3: The floating stair step treads made. These step treads are 1 7/8″ thick by 14″x36″. They are custom made hardwood treads. An Amish man in Indiana made them.
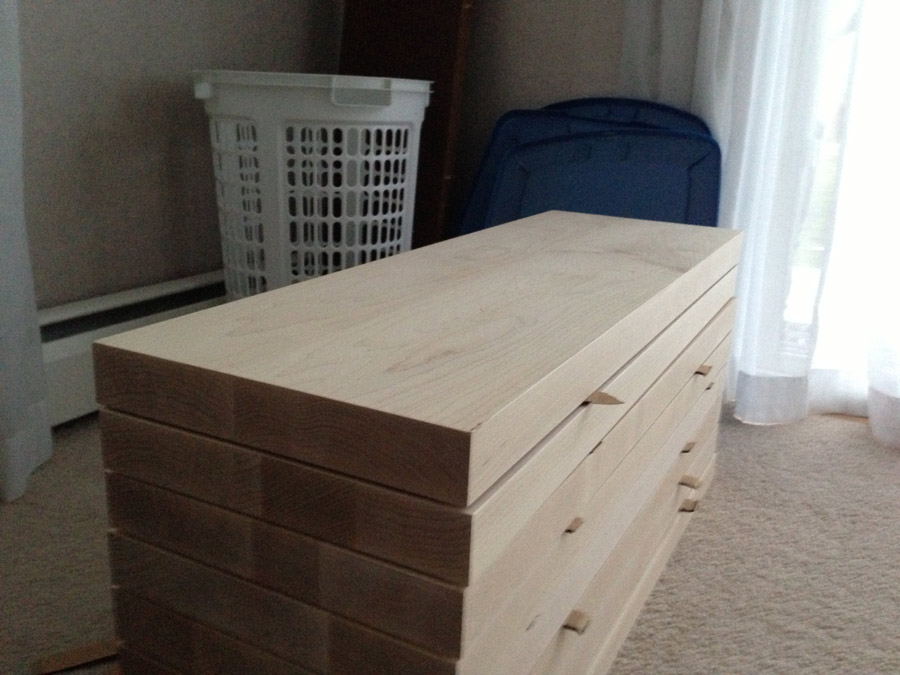
Floating Stair Step Treads: 1 7/8″x14″x36″ Custom made hard wood treads
Step 4: Step Supporting. The second stair stringer was installed using multiple screws as well as liquid nails for added stability. These floating stairs need vertical support as well. Notice also that “L” shaped brackets are attached already. It is easiest to install these before the second stringer is installed.
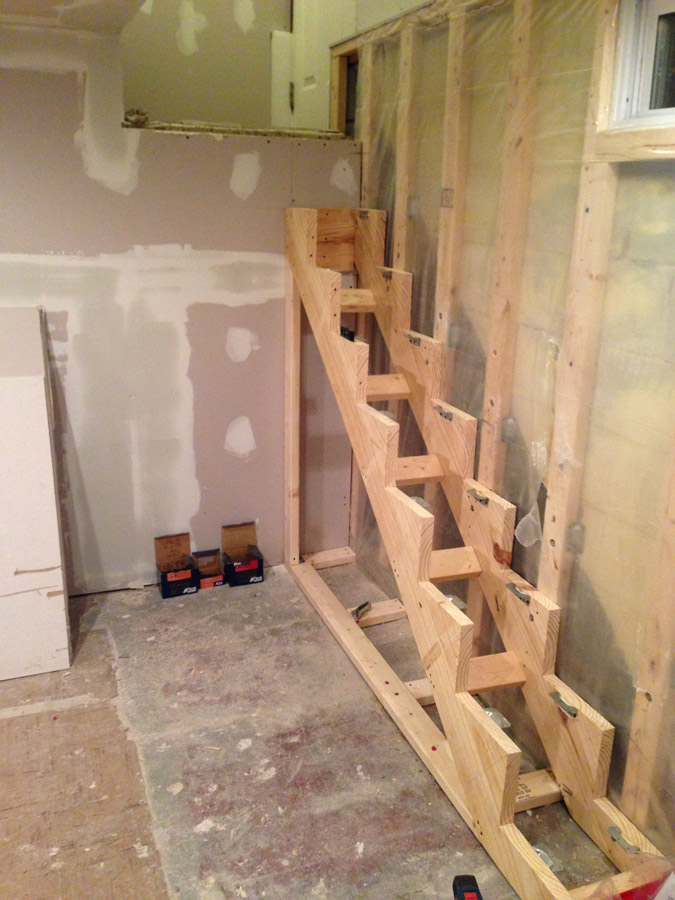
Floating Stair Step Supporting
Step 5: Leveling boards. Floating stairs shown below with leveling boards that were made to ensure treads had a level surface to sit on. Step braces are finished and ready for the stair tread installation.
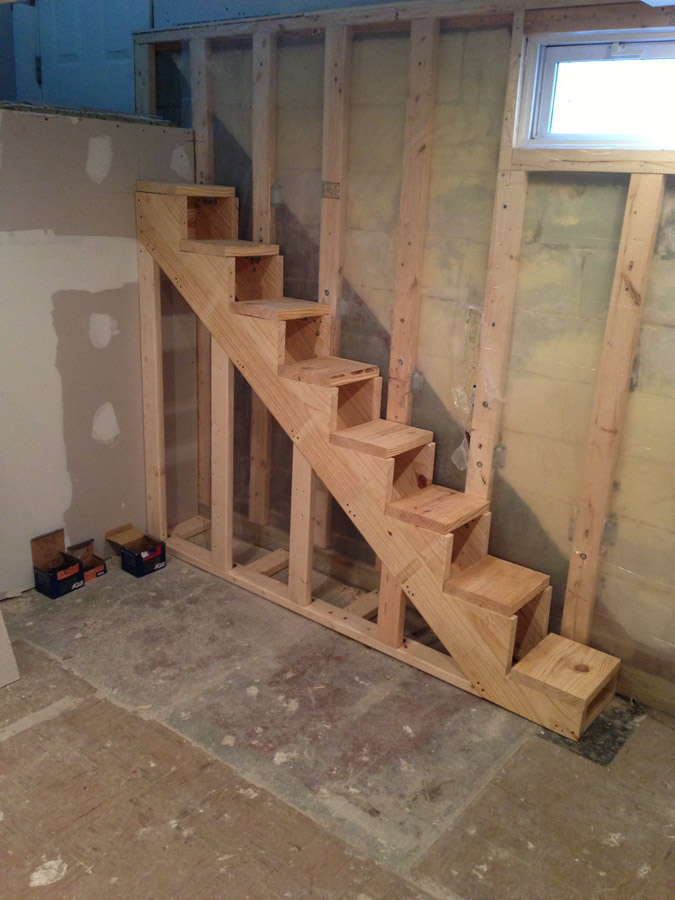
Floating Stairs Leveling Boards ensure a perfectly level surface for treads to be attached to.
Step 6: Install Floating Stair Treads. Progress on first steps, adding wood face support and treads- had to start at the top and work your way down. Underside of steps: Five lag bolts and multiple screws to lock tread in place with leveling wood plate underneath the tread. Use Liquid Nails on all the wood joints.
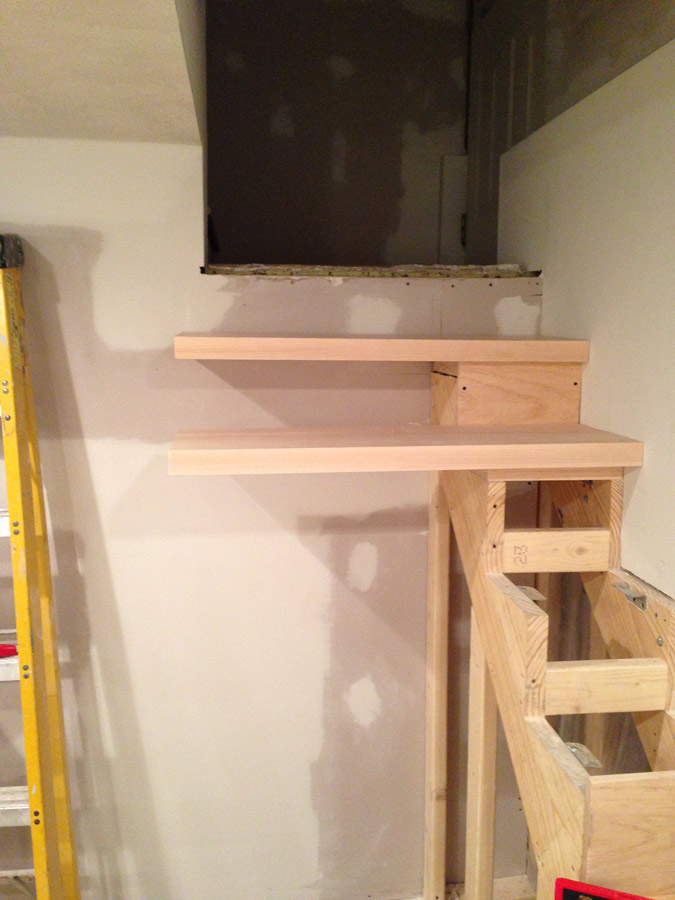
Installing the floating stair treads, starting top to bottom
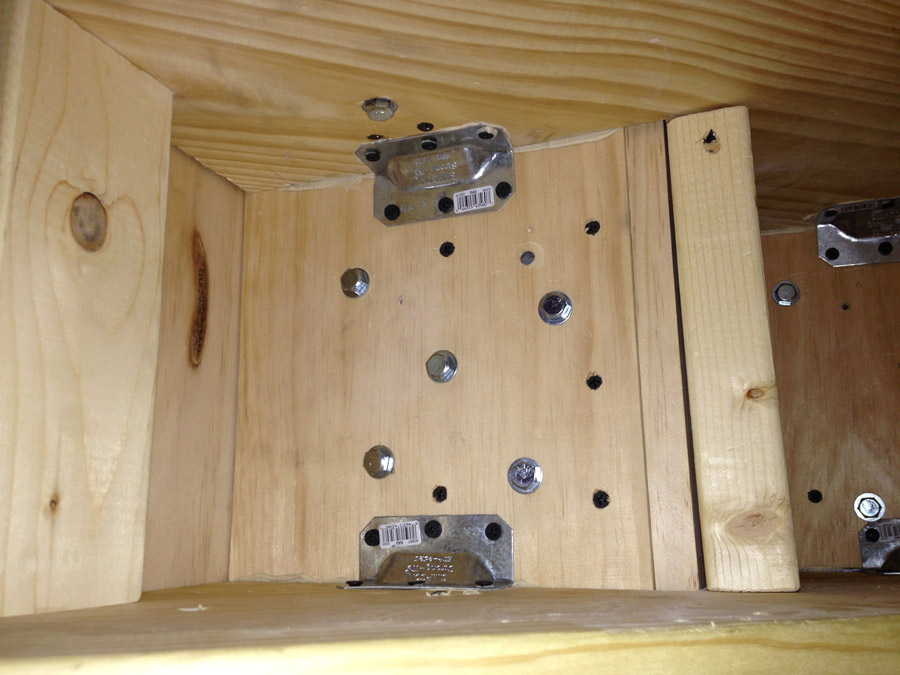
Underside of the stair tread attachment location. also note the liquid nails used on all joints.
This is ultimately this handy father’s design, and other than the custom treads (which he had an Amish man make) everything else was built/designed by him. He had to pre-drill all the lag bolts into the steps because of the wood being a hardwood (he broke a handful of lags because of this).
Liquid Nails was used in excess to ensure added security.
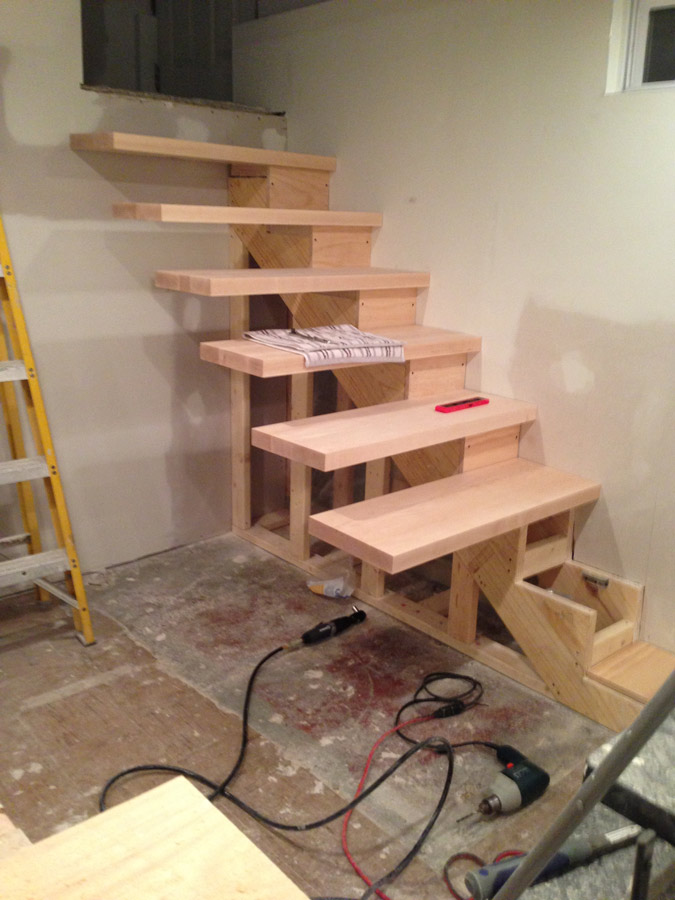
Floating Stairs almost complete, do it yourself floating stairs
This has been How to build floating stairs step by step instructions. Please leave a comment below, or tweet @HandyFather if you have any questions or to share your own project with other Handy Fathers like yourself.
Pingback:How to Build Floating Stairs - Handy Father
This is fantastic! I'll be sure to document and update you on my project!
Thank you, please keep me in the loop if you do this project (or something similar)!
I used your DIY in my own house! I changed it up a little bit, but the results are similar. My treads are made from 3.5" oak cribbing, stained. Turned out great! http://i.imgur.com/arjN2EW.jpg
What have you used for balustrade / hand rail?
A custom-cut piece of wood on standard handrail brackets was used.
nice job .. thnks for the idea.
Thanks for posting this 🙂 Very creative!
How did you fastened the lowest two treads? It looks like there is not enough space to work.
Hello. I was wondering the spacing between the stingers?
Stairs are usually rise+run=15-17″ Figure the tread depth and then the height of the staircase. Once you have these numbers, you can divide the space up and be sure you meet the 15-17″ total amount. See your local building codes for details.
Excellent process and steps. Do you feel there will be any flex on the treads or do you feel you will need to support the outside of the treads with cables? Thank you.
Arthur, the design had enough support and thickness in stair tread that further support was not needed. It would be best judged on a case-by-case basis.
I have been googling around looking to do something similar. It looks like these have been in for several years now, how have they held up?
Thanks!
Great pics! But why did you stop at “almost complete?” I would love to see pics of the finished product.
Hello
I’m laurence from france, I’ve seen your stair on the net. it’s butifull…so I will built the same…which size for the stair string (the lengh is about 5 meters)
Thanks for your help
Would you mind sharing photos? curtis@handyfather.com
I love this and I’m totally doing it!
1 question… and definitely an ignorant one… how did you bolt/screw in that bottom thread? Doesn’t look like enough room in there to get to it from the bottom w/ a drill.