DIY Brick Patio, walkway, fire pit.
Handy Father has been outside this spring, doing some projects. One of which has been rearranging an old brick walkway into a usable brick patio / fire pit. I know some of the “experts” will say that this project isn’t properly done, but the Handy Father is sometimes the Handy on a budget Father. This is one of those cases.
This DIY Brick Patio is a project I helped with by designing, and laying out the pattern as well as doing a lot of the actual brick laying. It is located at my father-in-law’s lot at the local Jellystone campground.
The original brick layout was a simple, and slightly curved 8 brick wide walkway that went about 20′ alongside the camp site. We pulled out a bunch of overgrowth as well as the old brick pathway. In all, there are about 300 plain red bricks and 100 big, thick bricks that have “Poston” on them. They are actual bricks from an old brick road.
Now, I know the proper way to lay out a brick patio would be to level the ground, laying in some gravel and sand, compacting the lot of it to form a rigid base for the bricks. The goal of this project, however, is to have a better use for the bricks, and to spend as little money as possible. We have decided to forego the gravel and sand compacted base.
DIY Brick Patio, Steps to completion:
 Step 1. Inventory and design. We took all of the bricks, counted and stacked them, and then laid out a plan that would meet our needs and use the bricks.
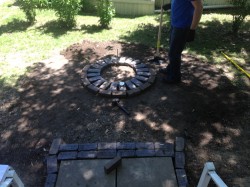
The brick patio is also a fire pit. I laid out the design for a 10′ circle pattern. The bricks, when arranged in a circle, have many gaps, but that also means you can cover more square footage with fewer bricks.

Do DIY brick patio installation in a weekend.
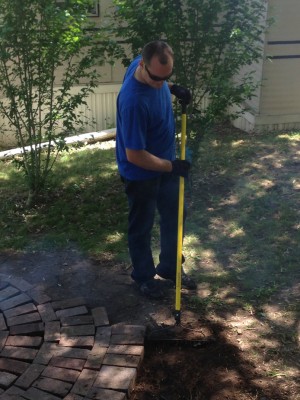
Step 2. Prepping the ground surface. As I mentioned previously, this project is being done as inexpensively as possible. We leveled and compacted the dirt using shovels and a Tamper, which is a somewhat heavy 10″x10″ square piece of steel on a pole that can be banged down on the ground and used to compact the dirt.
The more work you do on this step, the flatter your DIY brick patio will be. Our brick patio went in over a bit of a sloped area, so we brought in fill dirt from a friend’s property nearby to fill in and make the area as level as possible.
Step 3. Laying the DIY Brick Patio. Since my design was circular, I laid out the center of the patio, and worked my way out from there. If it weren’t a circular pattern, I’d have started from the doorway at the bottom of the stairs. I have bricks with writing on them as the outer edges of the design, and the plain bricks fill the center area.
Be sure that you set the bricks in place rather than sliding them in place or you will have to adjust the levelness of the dirt. If your prep work in leveling for the brick patio is done well, laying the patio bricks into a pattern won’t take long at all.

Step 4. Back Fill the gaps. Once all of the bricks are in place, be sure to fill in the gaps between the bricks. The best thing to use is a sand specifically designed for patios, but you can use dirt. You’ll have to keep the area weeded, but that is a pretty easy task with a weed eater.
DIY brick patios can be installed pretty quickly and isn’t a difficult project. The reward factor easily outweighed the work.
Pingback:Best 20 Diy Brick Patios - Best Collections Ever | Home Decor | DIY Crafts | Coloring | Birthday | Ideas