Replace a sway bar: Handy Father Style
- The clunking noise in the front end of my Explorer was the sway bar.
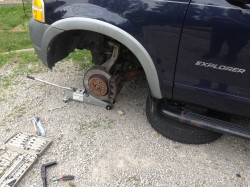
- To replace a sway bar, it’s easier to access the part if you remove the wheel.
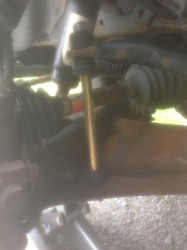
- My sway bar was completely seized up with rust, so I resorted to cutting it with a hacksaw.
Time to replace a Sway Bar
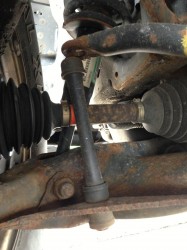
This past week I finally got around to looking for any sign of where the sound may be coming from. As pictured above, you’ll see that the sway bar is broken off at the top.
I am not a car guy. I do, however, have an iPhone, so I snapped a photo and brought it to my local auto parts store, where I purchased a Sway Bar replacement kit for $22.00.
How to replace a sway bar
I had the parts, and a desire to get the job done ASAP. The first thing I did was remove the tire so I’d have easier access to the sway bar. Judging by the the replacement parts, I thought it would be easy to remove the old bar, but I was wrong. The old sway bar was rusted through, and I couldn’t remove it. I resorted to pulling out my trusty hack saw. I’d have preferred an angle grinder, but I don’t have one.
I held the sway bar tight with pliers in one hand and cut with the other. Once removed, the replacement sway bar was easy to install. The kit I had came with a diagram showing the parts, but was not detailed enough to see which way parts went. I didn’t know how to replace a sway bar, so I used the tried and true trial by error method.
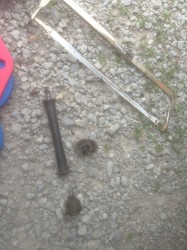
There were four cone-shaped washers, and four rubber spacers, one rod, one nut, and one spacer shaft. I put a washer on first, and then a rubber spacer, with a protuberance that appeared to go into the suspension hole facing upward. The bolt goes in through the bottom, upwards. With the first spacer and washer in place, I placed the bold through the bottom hole in the suspension. Next I placed a spacer over the bolt with the protuberance facing down, and then another washer followed by the metal spacer. Then comes the third washer and another rubber spacer with the protuberance facing up into the top hole for the suspension. The bar now goes up through both holes and the last spacer and washer are placed. Lastly goes the nut.
The instructions for replacing the Sway Bar say that the nut should be tightened until the rubber spacer start to bulge slightly, then turn the nut back 1/4 turn.
You’re done!
If I can replace a sway bar, then you can too. Don’t forget to put that wheel back on, and tighten up the lugs.
The clunking sound is gone. Happy wife, happy life. Probably safer too.


Comments
Replace a sway bar: Handy Father Style — No Comments
HTML tags allowed in your comment: <a href="" title=""> <abbr title=""> <acronym title=""> <b> <blockquote cite=""> <cite> <code> <del datetime=""> <em> <i> <q cite=""> <s> <strike> <strong>